iPads for Education: Using an iPad to Record a Video and Add to WTClass
There are two ways to record videos on your iPad:
- Recording the screen (audio or no audio)
- Recording yourself
Additional learn how to then add one of your recorded videos from your iPad into WTClass:
Recording the screen on iPad
- Swipe from the top-right corner of the iPad to bring up the Control Center.
- Look for the Screen Recording button. If the Screen Recording button does not appear in your Control Center, please visit the Customize Control Center page.
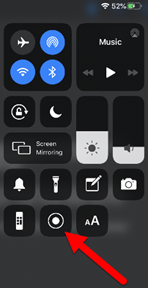
- If you are not recording your voice select the Screen Recording button and skip the next step.
- If recording your voice along with the screen, press and hold down the Screen Recording button.
- Turn on the Microphone if it is not already on
(microphone button will be red if ON) - Press Start Recording.
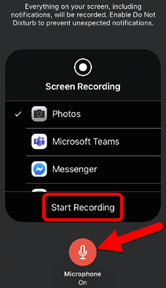
- The Screen Recording button will begin to count down. The iPad will start recording after it reaches zero (0).
- Close out of the screens by pressing off of the Screen Recording area (if necessary), and Control Panel to return to the main screen of the iPad.
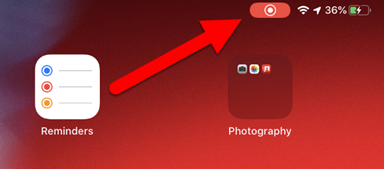
- The recording icon will appear in the top-right corner of the iPad to show it is still recording. To STOP recording, press this recording area.
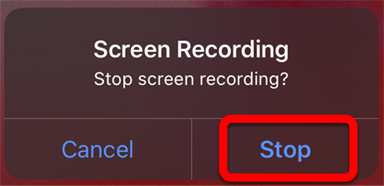
- On the confirmation to stop recording popup, select Stop.
- A notification will appear at the top notifying you that the Screen Recording was saved to Photos. Selecting the notification will open Photos and allow you to watch the video you just created.

Recording Yourself on iPad
- Open the Camera app.

- Change the recording type to Video.
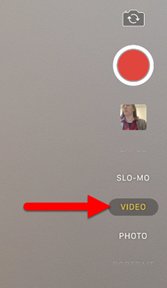
- Push the RED button to start recording.
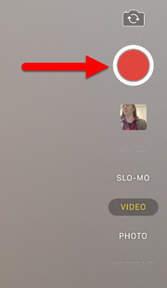
- Push the RED Square (where red button was) to stop recording.
- To review your video, press the thumbnail image below the recording button.
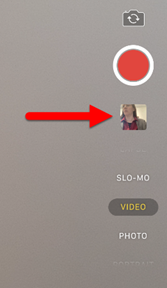
- Typically, the volume is muted upon playback on iPad, click the volume button to hear the audio.

Adding iPad Recorded Video to WTClass
Please review the document on the WT Panopto site for how to upload iPad recorded videos into WTClass using Panopto.
